Apply for an IPO on the Groww: A Detailed Step-by-Step Guide
Apply for an IPO in Groww is one of the best option to make money. Initial Public Offerings (IPOs) provide investors the opportunity to buy shares in a company before it’s listed on a stock exchange. This can be a lucrative investment opportunity, as IPOs allow investors to get in on the ground floor of potentially high-growth companies. Applying for IPOs has traditionally required paperwork, but with the rise of digital platforms, the process has become much simpler and quicker. Groww, a popular online investment platform in India, offers an easy and seamless way to apply for IPOs directly from your mobile device.
In this comprehensive guide, we will explain everything you need to know about applying for an IPO through the Groww app, step by step. Whether you are a seasoned investor or a beginner, by the end of this article, you’ll know how to navigate the process with ease to apply for an IPO.
What is an IPO?
An Initial Public Offering (IPO) is when a private company offers its shares to the public for the first time. This marks the company’s transition from a privately held entity to a publicly traded one. IPOs are a significant event because they allow companies to raise capital by offering shares to investors, and they give investors a chance to buy stock in a company at its listing price, which can sometimes be much lower than its post-listing trading price.
For investors, IPOs can be a way to purchase shares at an attractive price before the stock starts trading on the exchange. However, not all IPOs guarantee profits, and it’s crucial to research the company’s financials, business model, and growth potential before applying.
Table of Contents
Why Invest in IPOs via the Groww App?
Groww is a leading investment platform that offers an intuitive and easy-to-use interface, making it accessible even for beginners. Here are some of the key reasons to use Groww for IPO investments:
- User-Friendly Interface: The Groww app provides a simple, step-by-step process for applying for IPOs.
- Paperless Application: The entire IPO application process is completely digital, with no paperwork required.
- Access to Popular IPOs: Groww lists all upcoming and ongoing IPOs, allowing you to stay up-to-date and apply for IPOs that interest you.
- Real-Time Tracking: The app allows you to track the status of your IPO applications and view allotment results.
- Seamless UPI Integration: Groww uses UPI (Unified Payments Interface) to facilitate quick and secure payments for IPO applications.
Step-by-Step Guide to Apply for an IPO Using the Groww App
Now that you know why Groww is an excellent platform for IPO investments, let’s walk through the step-by-step process of applying for an IPO on the Groww app.
Step 1: Download and Install the Groww App
If you’re new to Groww, the first step is to download and install the Groww app on your mobile device. Here’s how:
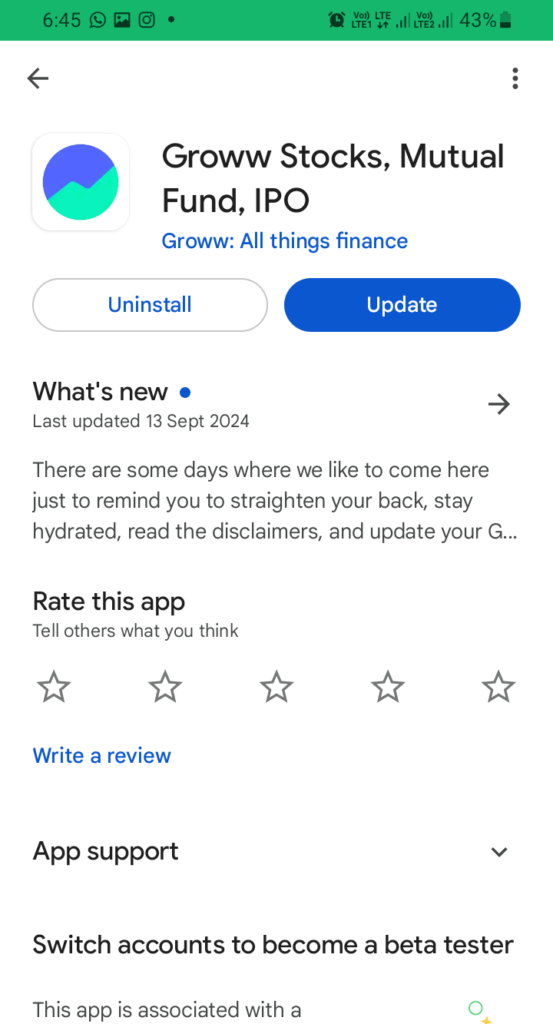
- For Android Users: Open the Google Play Store on your mobile and search for the Groww app. Click on Install to download and install the app.
- For iOS Users: Open the Apple App Store on your iPhone or iPad, search for Groww, and tap Get to download and install the app.

Once the app is installed, you will need to sign up if you don’t already have an account.
Step 2: Sign Up and Complete KYC
To participate in IPOs via Groww, you must complete your KYC (Know Your Customer) verification. This is a one-time process required by regulatory authorities to confirm your identity. The steps to sign up and complete KYC are as follows:
- Sign Up: Open the Groww app and tap Sign Up. You will need to provide basic details such as your name, email address, and mobile number. You can also use your Google or Facebook account for quick sign-up.
- Complete KYC: After signing up, the app will prompt you to complete the KYC verification process. You’ll need to provide the following information:
- PAN Card: Enter your PAN card details.
- Aadhaar Card: Link your Aadhaar for identity verification.
- Bank Details: Enter your bank account details (account number, IFSC code, etc.).
- Photograph: You’ll also need to upload a selfie to confirm your identity.
The KYC process usually takes a couple of days to get verified, but once it’s done, you’ll be eligible to apply for IPOs and invest in the stock market through Groww.
Step 3: Set Up UPI for Payments
Groww uses UPI (Unified Payments Interface) for facilitating payments for IPO applications. UPI allows you to approve and authorize the payment for your IPO application without entering your bank details every time. To set up UPI:
- Choose Your UPI App: You can use any UPI app, such as Google Pay, PhonePe, or Paytm. Make sure the UPI ID you enter is linked to the bank account from which you’ll pay for the IPO.
- Link UPI ID to Groww: After your KYC is verified, go to the Profile section in the Groww app and link your UPI ID. Once linked, this UPI ID will be used for all transactions, including IPO applications.
Step 4: Navigate to the IPO Section
Now that your account is set up and ready, it’s time to apply for an IPO. Follow these steps:
- Log In: Open the Groww app and log in with your credentials to apply for an IPO.
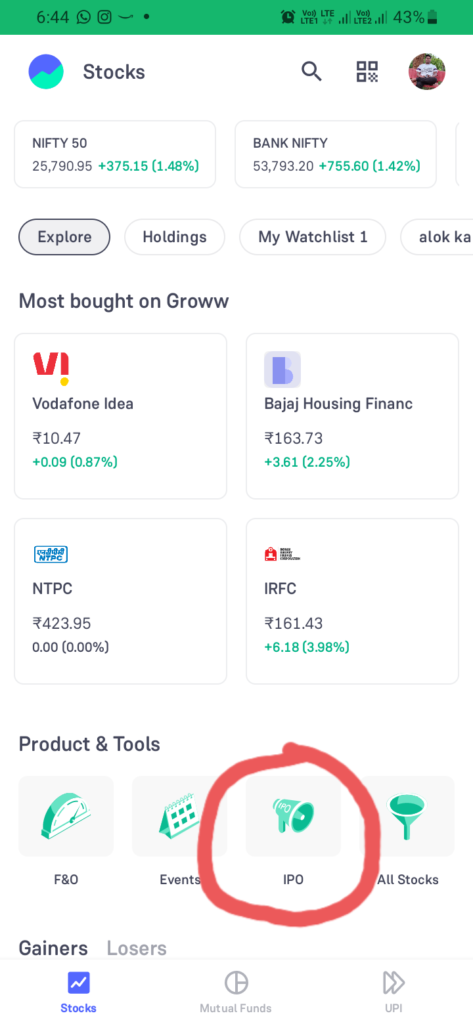
- Go to the ‘Stocks’ Section: On the Groww app’s home screen, you’ll find various options such as Mutual Funds, Stocks, Gold, and more. Select Stocks.
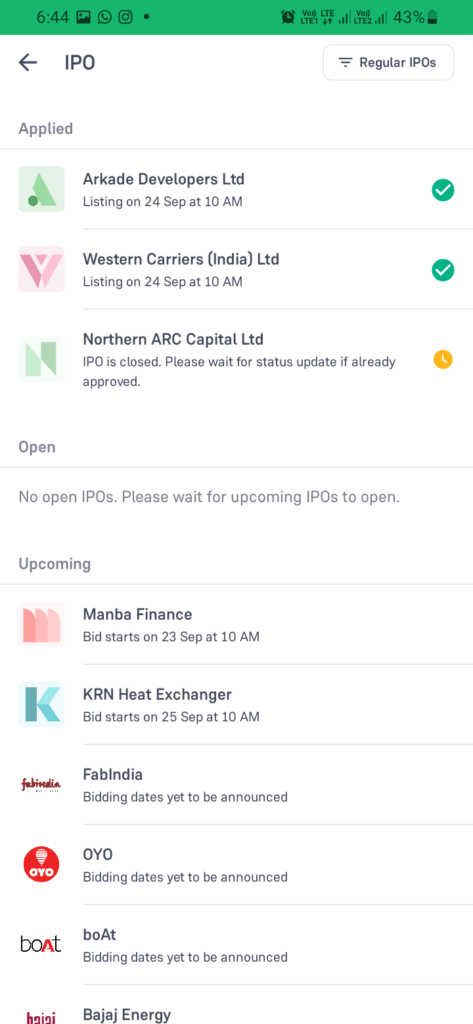
- Select ‘IPO’: In the Stocks section, you’ll see an IPO option. Tap on it to view the list of available IPOs.

Step 5: Choose an IPO
Once you’re in the IPO section, you’ll see a list of ongoing and upcoming IPOs to apply for an IPO. Each IPO will have detailed information including company background, price range, and other key data. Follow these steps:
- Review IPO Details: Tap on the IPO you’re interested in. Review the company’s financials, business model, and other important details such as the price band, minimum lot size, and dates for bidding.
- Select the IPO: After reviewing the information, if you decide to apply, tap on the Apply button next to the IPO to apply for an IPO.

Step 6: Apply for the IPO
Once you’ve selected the IPO you wish to apply for, you’ll need to complete the application. Follow these steps:
- Choose the Number of Lots: An IPO application requires you to bid in lots, where each lot consists of a specific number of shares. For example, if a company offers shares in lots of 10, you’ll need to apply for at least one lot, which means buying 10 shares. You can increase the number of lots based on your investment preference.
- Enter Your Bid Amount: When applying for an IPO, you’ll often be asked to enter a bid amount. This amount is within a price band, meaning the company gives you a range within which you can bid. You can either bid at the cut-off price (the final price decided by the company) or set a price within the band.
- Submit UPI ID: After selecting the number of lots and entering your bid amount, you will be prompted to enter your UPI ID. Make sure you enter the UPI ID linked to your bank account for the payment process.
- Confirm and Submit: After entering all the details, double-check the information. If everything is correct, submit your application.
Step 7: Approve UPI Mandate
Once you submit your IPO application, the next step is to approve the UPI mandate. The UPI mandate is a request sent to your UPI app asking you to authorize the blocking of funds required for the IPO application. Here’s how to approve the mandate:
- Open UPI App: Open the UPI app you used (Google Pay, PhonePe, or Paytm). You’ll receive a notification for a pending UPI mandate.
- Approve the Mandate: Review the details of the mandate, such as the amount to be blocked in your account. The amount is only blocked, not debited, unless you receive the allotment.
- Authorize Payment: Once you approve the mandate, the required amount will be blocked in your account until the IPO allotment is finalized.
Step 8: Check Allotment Status
After the subscription period of the IPO ends, the company will decide the share allotment. Not all applicants may receive an allotment, especially if the IPO is oversubscribed. Here’s how you can check whether you’ve been allotted shares:
- Go to IPO Section: Open the Groww app and go back to the IPO section.
- Check Allotment Status: Look for the IPO you applied for and tap on it. You’ll see an option to check your allotment status. The app will show whether shares have been allotted to you or not.
- Funds Release: If you didn’t get an allotment, the amount blocked in your bank account will automatically be released. If shares are allotted to you, the amount will be debited from your account, and the shares will be credited to your demat account.
Step 9: Post-Listing Trading
If you were allotted shares, you can track their performance once they are listed on the stock exchange. The Groww app allows you to monitor your investments, set price alerts, and decide when to sell or hold your IPO shares. Groww also provides real-time updates on stock prices, so you can manage your portfolio effectively.
For more such content follow Taza Content